
How to Make a Rose Hydrosol at Home (without a still)

After writing recently about hydrosols and why I think they're one of aromatherapy's most overlooked tools, I realised whilst I'd spent a lot of time using hydrosols and talking about what they are and why they deserve more attention... I'd never actually tried making one myself.
So by the time the roses in my garden came into bloom this year, I had already decided it was time to change that.
The good news is that you don't need a professional distillation setup or a copper still to experiment with making a simple rose hydrosol at home. All you need is some fragrant roses, a saucepan and a little patience.
The result won't be identical to a professionally distilled hydrosol, but it will give you a fascinating insight into the distillation process and leave you with a beautifully aromatic floral water to experiment with. Along the way, you'll also end up with something else that many people accidentally throw away: a wonderfully fragrant rose infusion (also known as a decoction) that can be used in all sorts of ways.
Here's what I learned...
Choosing the Right Roses
If you're going to take the time to make a rose hydrosol, the roses you choose matter.
The Damask rose (Rosa damascena) that is often considered the queen of aromatic roses and is widely regarded as the gold standard for rose essential oil production. Its rich phytochemical profile and beautifully complex fragrance make it one of the most prized roses in the world of perfumery and aromatherapy.
Most of us, however, aren't fortunate enough to have a field of Damask roses growing over the garden gate. Thankfully though, that's not the point. What matters most is fragrance.
It might sound obvious but one of the biggest mistakes people can make is choosing roses based on how they look rather than how they smell. Some of the most spectacular roses produce surprisingly little fragrance, whilst some of the simplest blooms can fill an entire garden with scent, so let your nose choose.
For the best results:
Choose highly fragrant roses.
Harvest them on a dry day once any morning dew has evaporated.
Pick blooms that have recently opened and are at their most fragrant.
Avoid flowers that are browning or beginning to fade.
Only use roses that have not been sprayed with pesticides, fungicides or other chemicals. Unfortunately floristy bunches won't do and are highly likey to have been sprayed.
Remember, the aroma in your final hydrosol can only come from the flowers you start with. If the roses don't smell particularly fragrant in the garden, they're unlikely to produce a particularly aromatic hydrosol.
How Many Roses Do You Need?
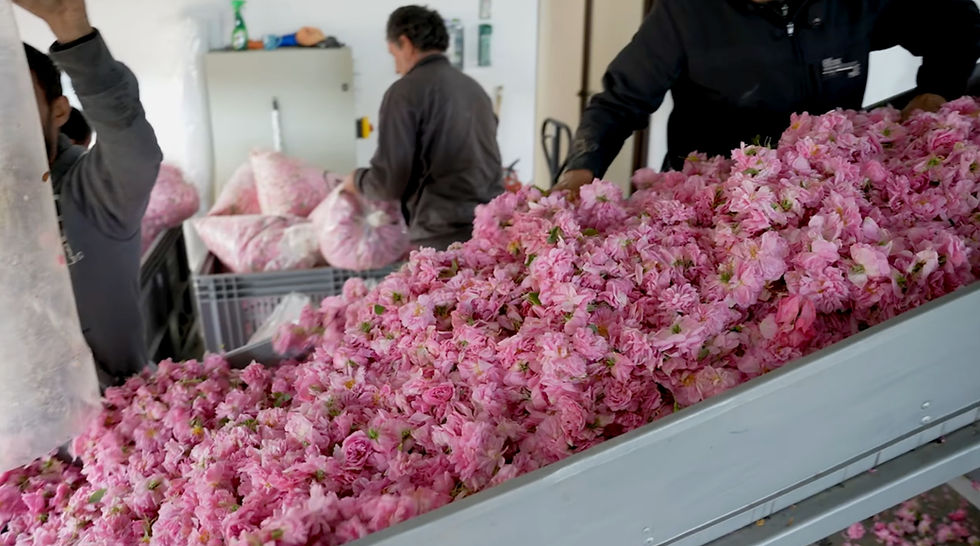
Commercial rose products require enormous quantities of petals. In fact, it takes over 10,000 rose blossoms to produce just 5ml of rose essential oil.
Thankfully, we're not trying to produce essential oil here.
For my first attempt, I used four large rose heads and was pleasantly surprised by how much hydrosol I collected - enough to comfortably fill a 4oz spray bottle.
That said, the more petals you can fit into your pan without overcrowding it, the more aromatic your final product is likely to be. If you're fortunate enough to have an abundance of roses, don't be afraid to be generous.
A Quick Note on Rose Water vs Rose Hydrosol
The terms "rose water" and "rose hydrosol" are often used interchangeably, but technically they aren't quite the same thing.
A true hydrosol is the aromatic water collected during distillation.
As steam passes through the rose petals, it carries aromatic compounds with it. When that steam cools and condenses, the resulting liquid is the hydrosol.
Rose water, on the other hand, is often made by infusing rose petals directly into water rather than distilling them. What's interesting about the stovetop method is that you actually end up with both.
The clear liquid collected in your bowl is your hydrosol.
The liquid left behind in the pan is a rose infusion or decoction.
Both have value. Both can be used. And we'll come back to that later.
How to Make Rose Hydrosol on the Stovetop
Before You Start
One thing that's worth mentioning is that hydrosols and other water-based preparations are generally far more susceptible to spoilage than essential oils.
Unlike essential oils, which are naturally resistant to microbial growth, preparations containing water can provide an environment in which moulds, yeasts and bacteria may grow if they're not handled carefully. For that reason, cleanliness matters.
Before starting, make sure your saucepan, bowls, bottles and utensils are thoroughly cleaned and, ideally, sterilised. I also like to spray my equipment and storage bottles with a high-proof alcohol and allow it to evaporate before use.
It's a simple step, but one that can help prolong the life of your finished hydrosol and reduce the risk of contamination.
You'll Need
Fresh rose petals
A large saucepan with a lid
A small heatproof bowl to collect your hydrosol in
A second heat proof bowl or ramekin dish (depending on the depth of your saucepan and lid handle)
Ice
Distilled water
High proof alcohol spray
Non-toxic clay or modelling putty
Method
Place an upended heatproof bowl in the centre of your saucepan.
Place your collecting bowl on top of this, ensuring that it is directly beneath the central metal handle of the pan lid (as this is where the condesate will drop from to form your hydrosol. You might have to play with idffernt bowls to perfect the height.
Arrange the rose petals around the outside of the bowl.
Add enough distilled water to barely cover the petals, avoid floating the bowl.
Turn the saucepan lid upside down and place it on top of the pan. The inverted lid helps direct condensation towards the centre where it can drip into your collection bowl.
If your lid contains a hole to allow steam to pass, this will need to be plugged with non-toxic putty or modelling clay.
Place a layer of ice on top of the inverted lid.
Bring the water to a gentle simmer.
As the steam rises through the rose petals, it carries aromatic compounds upwards. The cold lid causes the steam to condense and drip into the bowl below.
Allow the process to continue for around 30 to 40 minutes, replacing the ice as needed and spooning out the melted ice water.
Once finished, carefully remove the lid and collecting bowl.
The liquid you've collected in your bowl is your homemade rose hydrosol.
Allow it to cool completely before bottling.
Keep refridgerated and use within 1-2 weeks. More on this below.
Managing Expectations
This is probably the most important thing I can tell you.
Many people expect homemade rose hydrosol to smell like a bottle of rose perfume.
It doesn't and actually it shouldn't.
Depending on the variety of rose you've used, your hydrosol may smell:
Fresh and dewy
Green and leafy
Slightly fruity
Honeyed
Softly floral
Sometimes it smells more like a rose garden than a rose fragrance. And that's exactly as it should be.
Remember, you're not creating a perfume. You're capturing the water-soluble and aromatic components of a living plant.
In many ways, a successful homemade hydrosol smells more like standing beside a rose bush after summer rain than opening a bottle of commercial rose water.
Personally, I think that's part of its charm.
What Can You Use Rose Hydrosol For?
Rose hydrosol is wonderfully versatile and, in many situations, easier (and far less costly) to use than rose essential oil.
Some of my favourite uses include:
A Cooling Facial Mist
Perhaps the simplest use of all.
Store your hydrosol in the fridge and mist your face throughout the day during warm weather.
Facial Toner
I particularly enjoy using rose hydrosol after cleansing. Healthy skin naturally maintains a slightly acidic surface known as the acid mantle, and rose hydrosol's naturally acidic nature is one of the reasons it has been used as a traditional facial toner for generations. A quick spritz leaves the skin feeling refreshed, comfortable and beautifully hydrated - especially valuable if youre prne to dryness or sensitivity.
Clay Face Masks
Replace plain water with rose hydrosol when mixing clay masks.
It's a simple upgrade but a lovely one.
Compresses
Rose hydrosol makes a beautiful addition to cooling compresses for tired eyes or overheated skin.
Linen Sprays
A light mist on pillowcases, bedding or towels can be surprisingly uplifting.
Travel Companion
Hydrosols are wonderful for flights, long journeys and hot summer days.
If you'd like to explore more ways to use hydrosols, along with why they're so different from essential oils, you can read my full guide to hydrosols here.
Don't Throw Away the Rose Water
One of the things I love most about this process is that very little goes to waste.
Once you've collected your hydrosol, you'll still be left with a beautifully coloured and surprisingly fragrant rose decoction in the bottom of the pan.
Whilst it isn't technically a hydrosol, it's far too useful to throw away.
Some of my favourite ways to use it include:
Adding it to bath water
Mixing it into clay masks
Using it as a hair rinse
Adding it to homemade soaps or scrubs
Making a simple rose syrup
Adding it to iced tea or lemonade (provided your roses were unsprayed)
Freezing it into ice cubes
I particularly like freezing it in silicone moulds or ice cube trays. The fragrance fades fairly quickly, but freezing helps preserve it and gives you ready-made cubes that can be added to baths, face masks or summer drinks.
Storing Your Hydrosol
Because homemade hydrosol contains no preservatives, it should be treated much like any other fresh, water-based preparation.
For best results:
Bottle in a clean, sterilised glass container.
Store in the refrigerator.
Use within 1-2 weeks for optimal freshness.
Discard immediately if it develops cloudiness, sediment, mould or an unusual smell.
Freeze any excess in ice cube trays for longer-term storage.
If in doubt, throw it out.
Final Thoughts
Making a rose hydrosol at home gave me a much greater appreciation for the distillation process. It's easy to look at a bottle of hydrosol and assume it's simply scented water. In reality, capturing the aromatic essence of a plant takes time, patience and an extraordinary amount of plant material.
My homemade hydrosol whilst beautiful, wasn't intensely fragrant and it wasn't identical to a professionally distilled product. What it captured instead was something softer and more subtle: a snapshot of the roses growing in my garden at that particular moment in time. And I think that's what I enjoyed most about the process.
Not necessarily the finished product, but the opportunity to better understand what it takes to produce a hydrosol in the first place.
Will I continue making small batches when the roses are blooming?
Absolutely.
But this experiment also left me with a renewed appreciation for professionally produced hydrosols. Creating a stable, beautifully aromatic hydrosol requires skill, equipment and expertise that most of us simply don't have at home.
For me, the real value of making one yourself isn't necessarily replacing the hydrosols you buy. It's deepening your connection with the plants, the process and the remarkable journey that transforms a basket of rose petals into any number of beutifully useful products.


Comments